Estimated reading time: 12 minutes
Transforming JSON tool responses into rich UI widgets Here’s what happens when your AI tool returns data:
{
  "location": "San Francisco",
  "temperature": 68,
  "humidity": 45,
  "conditions": "sunny",
  "windSpeed": 8
}
The user sees… JSON. Or maybe the LLM summarizes it into text. Either way, it’s functional but not beautiful. Not interactive. Not what users expect from modern AI apps. What if your tool could return this instead? UI widgets example A beautiful card with the temperature displayed prominently, a weather icon, a gradient background—rendered right inside ChatGPT. That’s exactly what FrontMCP’s Tool UI does.

The Platform Fragmentation Problem

Rich UI in AI responses sounds simple until you realize:
  • ChatGPT renders widgets in iframes with specific security rules
  • Claude has limited UI support
  • OpenAI Apps SDK expects specific metadata formats
  • Each platform has different CSP (Content Security Policy) requirements
  • You can’t use external scripts or stylesheets
Building widgets for each platform means:
PlatformWidget FormatSecurity Model
ChatGPTiframe + window.openai APIStrict CSP, isolated origin
ClaudeLimited HTMLMarkdown + basic HTML
Custom clientsVaries wildlyCustom implementation
Most developers give up and return plain text. FrontMCP handles all of this automatically. You write one template, and Tool UI adapts it to each platform.

What is Tool UI?

Tool UI is a rendering system built into FrontMCP that:

Type-Safe Templates

Template functions receive typed input and output based on your Zod schemas. TypeScript catches errors before runtime.

Platform Aware

Automatically detects ChatGPT, Claude, ext-apps, and custom clients. Renders appropriately for each.

Security Built-In

XSS prevention, safe JSON embedding, Content Security Policy—all handled automatically.

Graceful Degradation

If a platform doesn’t support UI, your tool still returns structured data. Never fails silently.
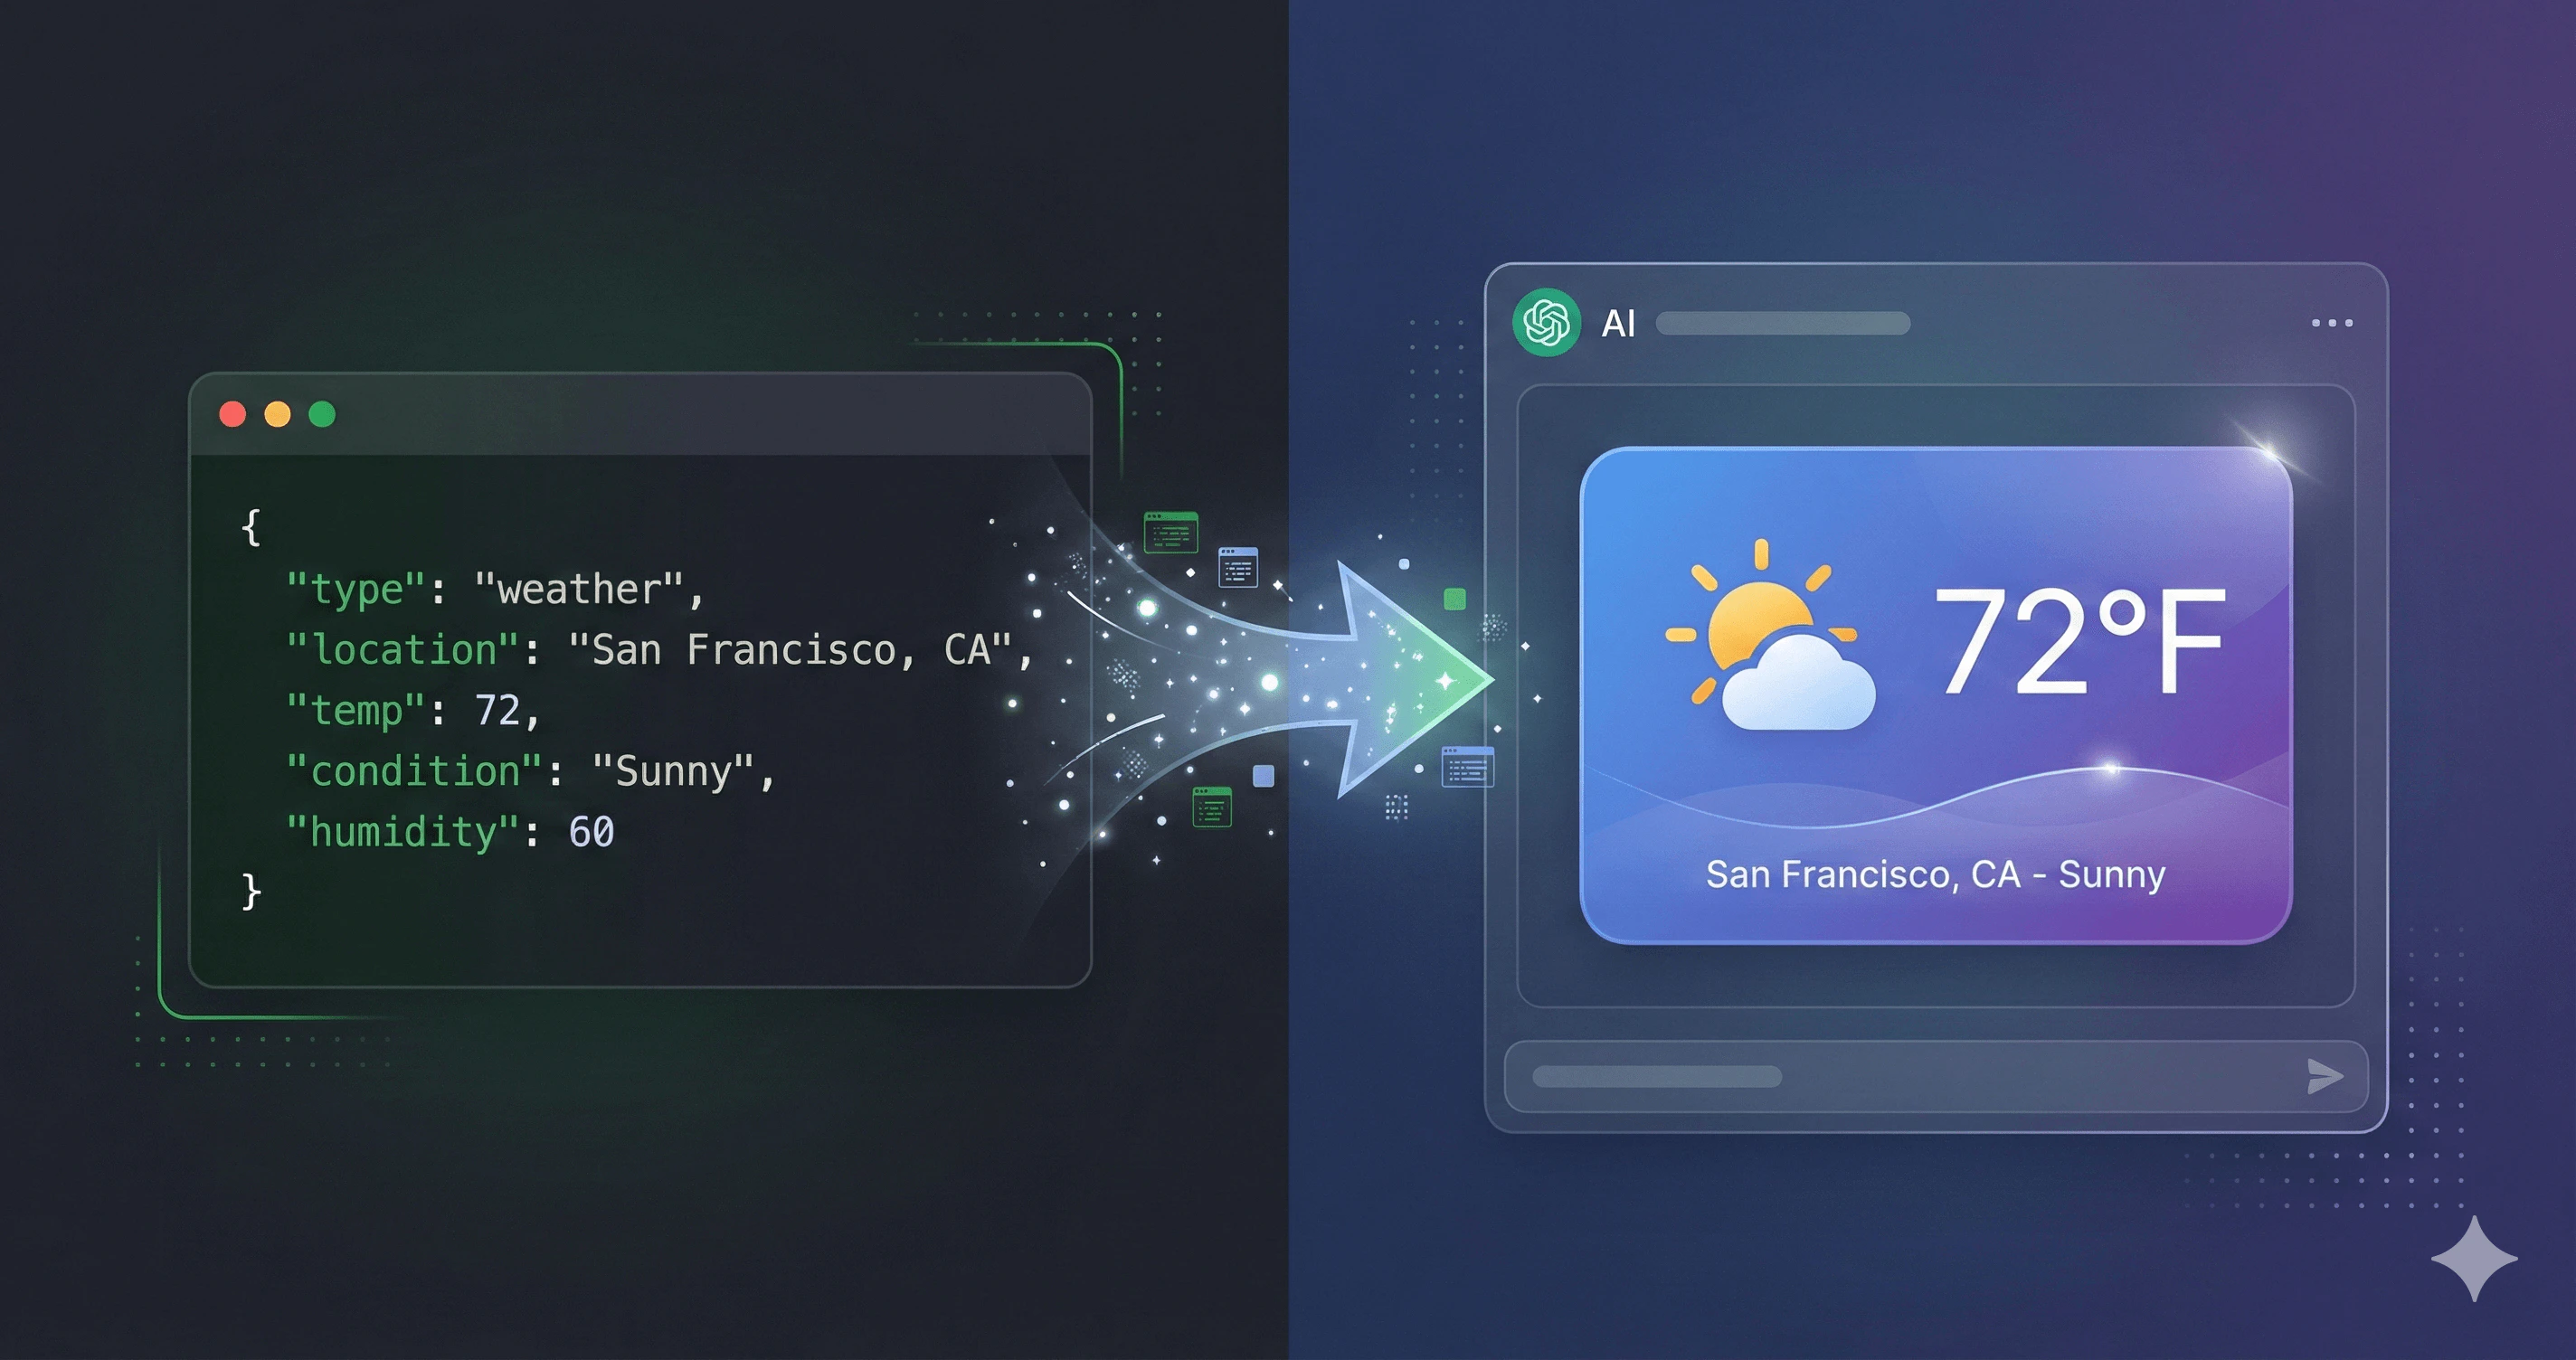
Your First Widget

Let’s add a UI widget to a weather tool. Start with a basic tool:
import { Tool, ToolContext, z } from '@frontmcp/sdk';

const inputSchema = {
  location: z.string().describe('City name'),
  units: z.enum(['celsius', 'fahrenheit']).default('celsius'),
};

const outputSchema = z.object({
  location: z.string(),
  temperature: z.number(),
  humidity: z.number(),
  windSpeed: z.number(),
  conditions: z.string(),
  units: z.enum(['celsius', 'fahrenheit']),
});

@Tool({
  name: 'get-weather',
  description: 'Get current weather for a location',
  inputSchema,
  outputSchema,
})
class GetWeatherTool extends ToolContext<typeof inputSchema, typeof outputSchema> {
  async execute(input: { location: string; units: string }) {
    // Fetch weather data...
    return {
      location: input.location,
      temperature: 68,
      humidity: 45,
      windSpeed: 8,
      conditions: 'sunny',
      units: input.units as 'celsius' | 'fahrenheit',
    };
  }
}
Now add the ui property:
@Tool({
  name: 'get-weather',
  description: 'Get current weather for a location',
  inputSchema,
  outputSchema,
  ui: {
    widgetDescription: 'Displays current weather with temperature and conditions',
    displayMode: 'inline',
    servingMode: 'auto',
    template: (ctx) => {
      const tempSymbol = ctx.output.units === 'celsius' ? '°C' : '°F';
      const icon = ctx.output.conditions === 'sunny' ? '☀️' : '🌤️';

      return `
        <div style="
          background: linear-gradient(135deg, #667eea 0%, #764ba2 100%);
          border-radius: 16px;
          padding: 24px;
          color: white;
          font-family: system-ui, sans-serif;
          max-width: 320px;
        ">
          <div style="font-size: 14px; opacity: 0.9; margin-bottom: 8px;">
            ${ctx.helpers.escapeHtml(ctx.output.location)}
          </div>
          <div style="font-size: 48px; font-weight: 700; margin-bottom: 16px;">
            ${icon} ${ctx.output.temperature}${tempSymbol}
          </div>
          <div style="display: grid; grid-template-columns: 1fr 1fr; gap: 12px; font-size: 14px;">
            <div>
              <div style="opacity: 0.7;">Humidity</div>
              <div style="font-weight: 600;">${ctx.output.humidity}%</div>
            </div>
            <div>
              <div style="opacity: 0.7;">Wind</div>
              <div style="font-weight: 600;">${ctx.output.windSpeed} km/h</div>
            </div>
          </div>
          <div style="margin-top: 16px; font-size: 14px; text-transform: capitalize;">
            ${ctx.helpers.escapeHtml(ctx.output.conditions)}
          </div>
        </div>
      `;
    },
  },
})
class GetWeatherTool extends ToolContext<typeof inputSchema, typeof outputSchema> {
  // ... execute method
}
When ChatGPT calls this tool, users see a beautiful weather card—not raw JSON.

Template Context API

The template function receives a context object with everything you need:
template: (ctx) => {
  // Typed input from your inputSchema
  ctx.input.location;    // string
  ctx.input.units;       // 'celsius' | 'fahrenheit'

  // Typed output from your outputSchema
  ctx.output.temperature; // number
  ctx.output.conditions;  // string

  // Helper functions
  ctx.helpers.escapeHtml(str);     // XSS-safe escaping
  ctx.helpers.formatDate(date);    // Date formatting
  ctx.helpers.formatCurrency(n);   // Currency formatting
  ctx.helpers.uniqueId('prefix');  // Generate unique IDs
  ctx.helpers.jsonEmbed(obj);      // Safe JSON embedding

  return '<div>...</div>';
}

Type Safety

Because inputSchema and outputSchema are Zod schemas, TypeScript knows exactly what’s available:
template: (ctx) => {
  ctx.output.foo; // TypeScript Error: 'foo' does not exist
  ctx.output.temperature.toUpperCase(); // Error: toUpperCase doesn't exist on number
}
Always use ctx.helpers.escapeHtml() for user-provided data. It prevents XSS attacks by escaping <, >, &, ", and '.

Serving Modes

Tool UI supports four serving modes, each with different trade-offs:
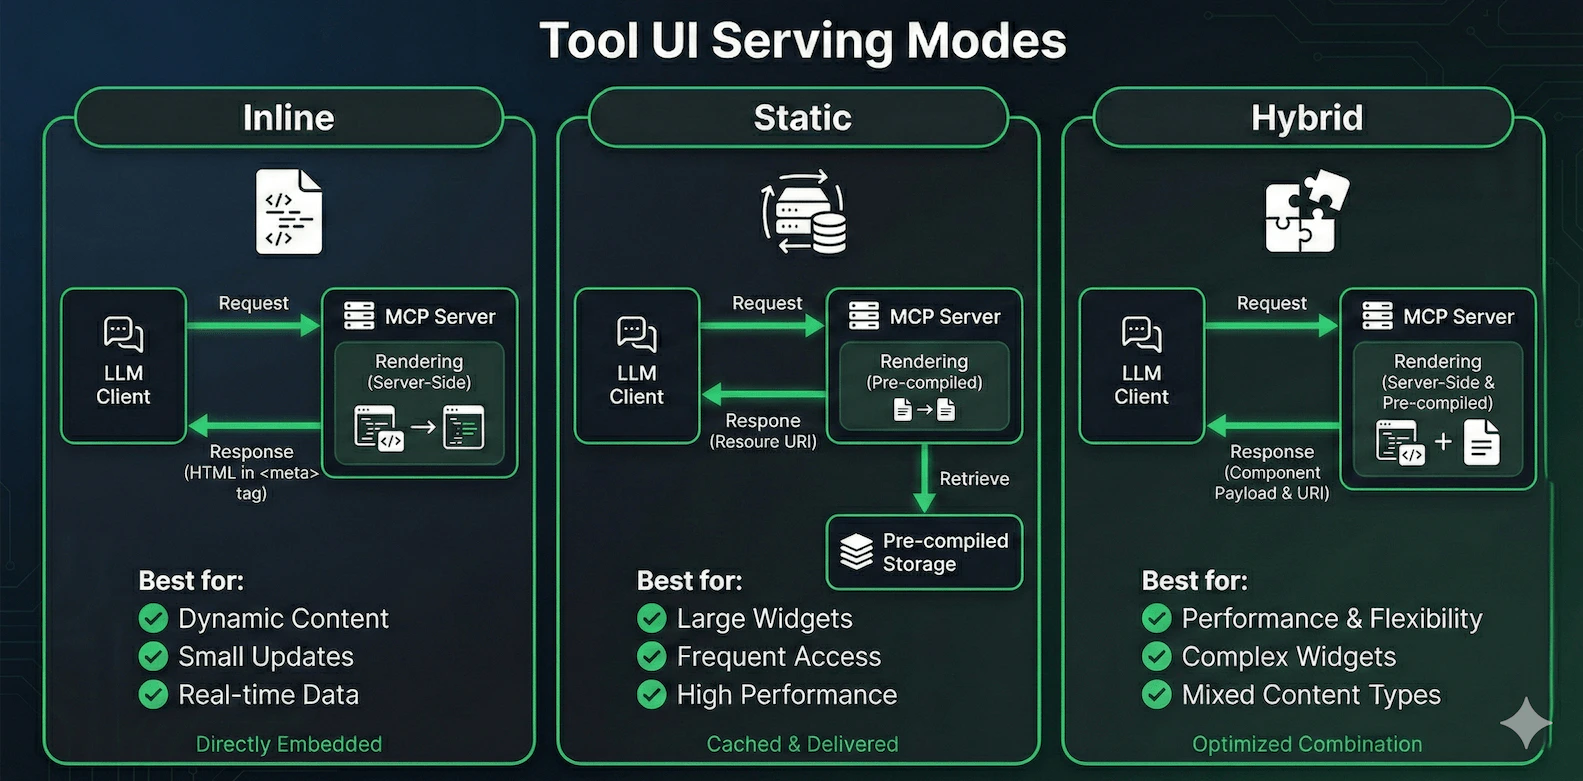
 Tool UI Serving Modes Comparison Diagram
Renders HTML on every request, embeds in response metadata.
ui: {
  servingMode: 'inline',
  template: (ctx) => `<div>${ctx.output.value}</div>`,
}
Pros:
  • Fresh content every time
  • Simple to implement
  • Works with all platforms
Cons:
  • Larger response payload
  • Rendering overhead per request
Best for: Dynamic content that changes per request

Using @frontmcp/ui Components

Writing raw HTML gets tedious. FrontMCP provides two approaches: HTML string functions for simple templates and React components for interactive widgets.

HTML String Components

Import from @frontmcp/ui/components—these functions return HTML strings:
import { card, badge, descriptionList, button } from '@frontmcp/ui/components';

@Tool({
  name: 'get-weather',
  // ...
  ui: {
    template: (ctx) => {
      const weatherDetails = descriptionList([
        { term: 'Humidity', description: `${ctx.output.humidity}%` },
        { term: 'Wind', description: `${ctx.output.windSpeed} km/h` },
      ], { layout: 'grid' });

      const conditionBadge = badge(ctx.output.conditions, {
        variant: ctx.output.conditions === 'sunny' ? 'success' : 'info',
      });

      const header = `${ctx.output.temperature}°${ctx.output.units === 'celsius' ? 'C' : 'F'}`;

      return card(
        `${header}${conditionBadge}${weatherDetails}`,
        {
          title: ctx.helpers.escapeHtml(ctx.output.location),
          subtitle: 'Current Weather',
          variant: 'elevated',
        }
      );
    },
  },
})

React Widgets (Static Mode)

For complex, interactive widgets, create a separate React component file. FrontMCP bundles these at server startup and serves them as static widgets: 1. Create the widget file (widgets/weather-widget.tsx):
import { Card, Badge, Button } from '@frontmcp/ui/react';
import { McpBridgeProvider, useToolOutput, useCallTool } from '@frontmcp/ui/react/hooks';

interface WeatherOutput {
  location: string;
  temperature: number;
  conditions: string;
  units: 'celsius' | 'fahrenheit';
}

function WeatherWidget() {
  const output = useToolOutput<WeatherOutput>();
  const [refresh, { loading }] = useCallTool('get-weather');

  if (!output) return <div>Loading...</div>;

  const tempSymbol = output.units === 'celsius' ? '°C' : '°F';

  return (
    <Card title={output.location} subtitle="Current Weather" variant="elevated">
      <div className="text-5xl font-bold mb-4">
        {output.temperature}{tempSymbol}
      </div>
      <Badge variant={output.conditions === 'sunny' ? 'success' : 'info'}>
        {output.conditions}
      </Badge>
      <Button
        onClick={() => refresh({ location: output.location })}
        loading={loading}
        className="mt-4"
      >
        Refresh
      </Button>
    </Card>
  );
}

// Export wrapped with provider
export default function Widget() {
  return (
    <McpBridgeProvider>
      <WeatherWidget />
    </McpBridgeProvider>
  );
}
2. Reference the widget in your tool:
import { Tool, ToolContext, z } from '@frontmcp/sdk';

@Tool({
  name: 'get-weather',
  description: 'Get current weather for a location',
  inputSchema: {
    location: z.string(),
    units: z.enum(['celsius', 'fahrenheit']).default('celsius'),
  },
  outputSchema: z.object({
    location: z.string(),
    temperature: z.number(),
    conditions: z.string(),
    units: z.enum(['celsius', 'fahrenheit']),
  }),
  ui: {
    servingMode: 'static',
    widgetAccessible: true, // Enable MCP Bridge for tool callbacks
    widget: './widgets/weather-widget.tsx', // Path to React widget
  },
})
export default class GetWeatherTool extends ToolContext {
  async execute(input: { location: string; units: string }) {
    // Fetch weather data...
    return {
      location: input.location,
      temperature: 68,
      conditions: 'sunny',
      units: input.units as 'celsius' | 'fahrenheit',
    };
  }
}
React widgets are transpiled once at server startup, not on every request. The bundled widget reads tool output from the platform context (window.openai.toolOutput on ChatGPT) and can call back to tools via the MCP Bridge.

Choosing Your Approach

ApproachWhen to UseServing Mode
HTML StringsSimple data display, dynamic templatesinline or auto
React WidgetsInteractive UI, complex layouts, tool callbacksstatic

Available Components

card()

Container with title, subtitle, and actions

badge()

Status indicators and labels

button()

Interactive buttons (for MCP Bridge)

descriptionList()

Key-value data display

table()

Tabular data rendering

alert()

Status messages and notifications
HTML String Components (@frontmcp/ui/components):
  • card(content, options) - Card container
  • badge(text, options) - Status badge
  • button(text, options) - Clickable button
  • descriptionList(items, options) - Key-value pairs
  • table(columns, data, options) - Data table
  • alert(content, options) - Alert message
  • form(content, options) - Form container
  • input(options) - Text input
  • select(options) - Dropdown select
  • modal(content, options) - Modal dialog
React Components (@frontmcp/ui/react) - for static widgets:
  • <Card> - Card container with title, subtitle, actions
  • <Badge> - Status indicators and labels
  • <Button> - Clickable buttons with loading state
  • <Alert> - Info, success, warning, danger alerts
React Hooks (@frontmcp/ui/react/hooks) - for interactive widgets:
  • useToolInput<T>() - Get typed tool input
  • useToolOutput<T>() - Get typed tool output
  • useCallTool(name) - Call another tool from widget
  • useTheme() - Access theme context
  • useMcpBridge() - Low-level bridge access

Security Features

Tool UI has security built in at multiple layers:

XSS Prevention

The escapeHtml() helper escapes dangerous characters:
// User input: "<script>alert('xss')</script>"
ctx.helpers.escapeHtml(userInput);
// Output: "&lt;script&gt;alert('xss')&lt;/script&gt;"
Always escape user-provided data:
// ✅ Safe
template: (ctx) => `<div>${ctx.helpers.escapeHtml(ctx.output.name)}</div>`

// ❌ Dangerous - XSS vulnerability
template: (ctx) => `<div>${ctx.output.name}</div>`

Safe JSON Embedding

Need to pass data to JavaScript in your widget?
template: (ctx) => `
  <script>
    const data = ${ctx.helpers.jsonEmbed(ctx.output)};
    // Safe! Escapes </script> and other dangerous patterns
  </script>
`

Content Security Policy

FrontMCP generates appropriate CSP headers for each platform:
ui: {
  csp: {
    'script-src': ["'self'"],
    'style-src': ["'self'", "'unsafe-inline'"],
    'img-src': ["'self'", 'https:'],
  },
}
Never use eval(), new Function(), or inline event handlers like onclick. These are blocked by CSP and create security vulnerabilities.

Platform Behavior

ChatGPT (OpenAI Apps SDK)

ChatGPT renders Tool UI widgets in an iframe: The widget can access tool output via window.openai.toolOutput for static serving mode.

Claude

Claude has limited UI support. Tool UI gracefully degrades:
  • Widgets are not rendered
  • Tool returns structured JSON as usual
  • Claude summarizes the data in natural language
This is automatic—no code changes needed.

Custom Clients

For custom MCP clients, Tool UI metadata is available in _meta:
{
  "content": [{"type": "text", "text": "..."}],
  "_meta": {
    "ui/html": "<div>...</div>",
    "frontmcp/html": "<div>...</div>"
  }
}
Your client can render the HTML or ignore it.

Advanced: MCP Bridge

For truly interactive widgets, use the MCP Bridge to call tools from within the widget:
@Tool({
  name: 'interactive-form',
  ui: {
    widgetAccessible: true, // Enable MCP Bridge
    template: (ctx) => `
      <form id="feedback-form">
        <input name="rating" type="number" min="1" max="5" />
        <button type="submit">Submit</button>
      </form>
      <script>
        const form = document.getElementById('feedback-form');
        form.addEventListener('submit', async (e) => {
          e.preventDefault();
          const rating = form.elements.rating.value;

          // Call another tool from the widget!
          const result = await window.frontmcp.callTool('submit-rating', {
            rating: parseInt(rating)
          });

          alert('Rating submitted!');
        });
      </script>
    `,
  },
})
MCP Bridge is only available in platforms that support it (currently ChatGPT with OpenAI Apps SDK). Use feature detection before calling
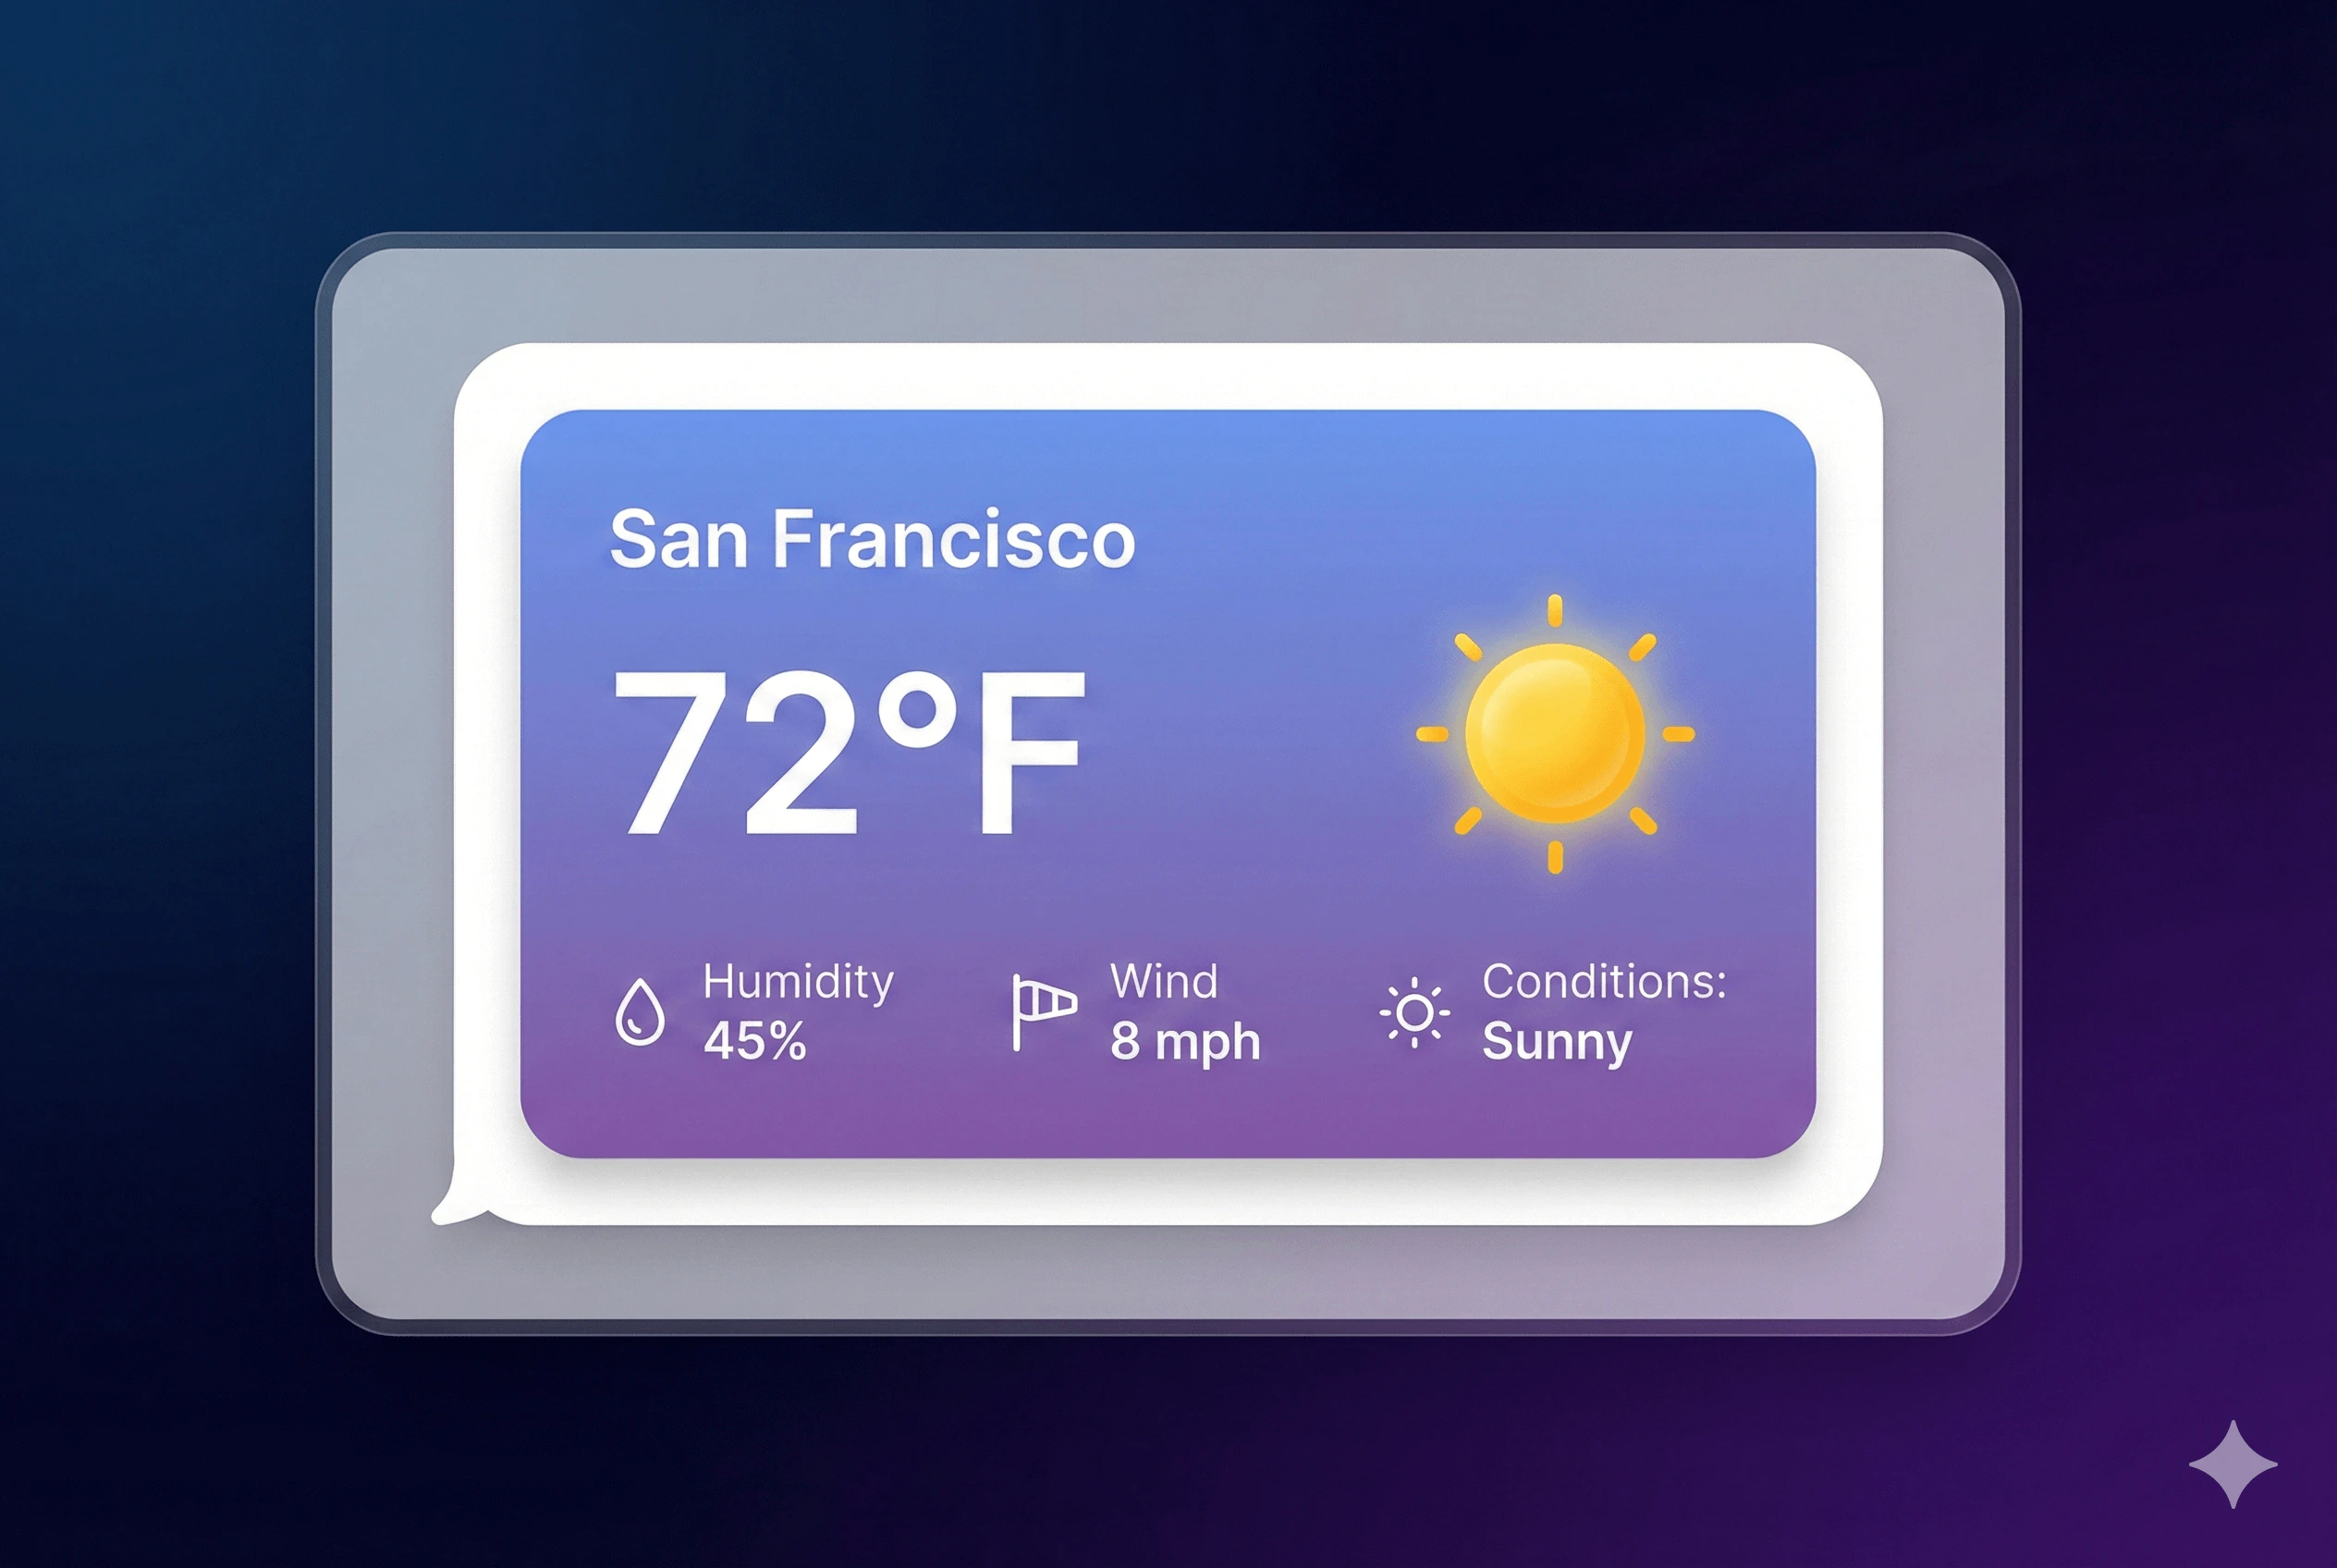
 window.frontmcp.

Real-World Example: Complete Weather Widget

Here’s a production-ready weather widget with all best practices:
import { Tool, ToolContext, z } from '@frontmcp/sdk';
import { card, descriptionList, badge } from '@frontmcp/ui/components';

const weatherIcons: Record<string, string> = {
  sunny: '☀️',
  cloudy: '☁️',
  rainy: '🌧️',
  snowy: '❄️',
  stormy: '⛈️',
};

@Tool({
  name: 'get-weather',
  description: 'Get current weather for any location',
  inputSchema: {
    location: z.string().describe('City name or coordinates'),
    units: z.enum(['celsius', 'fahrenheit']).default('celsius'),
  },
  outputSchema: z.object({
    location: z.string(),
    temperature: z.number(),
    feelsLike: z.number(),
    humidity: z.number(),
    windSpeed: z.number(),
    conditions: z.string(),
    units: z.enum(['celsius', 'fahrenheit']),
    updatedAt: z.string(),
  }),
  ui: {
    widgetDescription: 'Interactive weather card with current conditions',
    displayMode: 'inline',
    servingMode: 'auto',
    template: (ctx) => {
      const { output, helpers } = ctx;
      const icon = weatherIcons[output.conditions] || '🌤️';
      const tempSymbol = output.units === 'celsius' ? '°C' : '°F';

      const details = descriptionList([
        { term: 'Feels Like', description: `${output.feelsLike}${tempSymbol}` },
        { term: 'Humidity', description: `${output.humidity}%` },
        { term: 'Wind', description: `${output.windSpeed} km/h` },
      ], { layout: 'grid', className: 'mt-4' });

      const conditionBadge = badge(
        helpers.escapeHtml(output.conditions),
        {
          variant: output.conditions === 'sunny' ? 'success' :
                   output.conditions === 'stormy' ? 'danger' : 'info',
          size: 'md',
        }
      );

      const header = `
        <div style="display: flex; align-items: center; gap: 16px;">
          <span style="font-size: 64px;">${icon}</span>
          <div>
            <div style="font-size: 48px; font-weight: 700;">
              ${output.temperature}${tempSymbol}
            </div>
            ${conditionBadge}
          </div>
        </div>
      `;

      const footer = `
        <div style="font-size: 12px; color: #666; margin-top: 16px;">
          Updated: ${helpers.formatDate(output.updatedAt, 'datetime')}
        </div>
      `;

      return card(`${header}${details}${footer}`, {
        title: helpers.escapeHtml(output.location),
        subtitle: 'Current Weather',
        variant: 'elevated',
        size: 'md',
        className: 'weather-widget',
      });
    },
  },
})
export default class GetWeatherTool extends ToolContext {
  async execute(input: { location: string; units: string }) {
    // Fetch from weather API...
    return {
      location: input.location,
      temperature: 68,
      feelsLike: 65,
      humidity: 45,
      windSpeed: 8,
      conditions: 'sunny',
      units: input.units as 'celsius' | 'fahrenheit',
      updatedAt: new Date().toISOString(),
    };
  }
}

Get Started

Tool UI Documentation

Complete API reference for templates, components, and configuration

Component Library

Browse all available UI components with examples

Platform Integration

Deep dive into ChatGPT, Claude, and custom client support

MCP Bridge Guide

Build interactive widgets that call back to your tools

Tool UI is part of FrontMCP’s mission to make AI tools feel native and beautiful. Combine it with Agents for autonomous workflows and deploy to Vercel for global edge performance. Star us on GitHub to follow development.